
Styling to camera.
In the Still Smiths photography studio, our daily workflow involves creating images from scratch. We start with a bare trestle table and build everything from the background up. To do this, there are two industry terms that we use on set -
‘Framing’
‘Styling to Camera’
It is important as a small biz owner to understand what this way of working looks like and what it means for the final orientation of your images (yes, you have to know what the images will be used for before the shoot). Armed with this knowledge, your image deliverables will be clear, you will know your limitations and the shot list can be organised to suit.
What is framing?
This is the process of choosing how to compose the image. It includes selecting portrait or landscape orientation and allowing the right amount of negative space to accommodate the final use of the image. Along with these considerations, a photographer is thinking about the scale of the product within the scene and choosing the correct lens to work with the desired orientation.
What is styling to camera?
Styling to camera is the process used to position the camera in a locked frame so that it doesn’t move and tether the camera body to a computer. The stylist and photographer both work from the digital screen instead of the camera viewfinder so that they can see extreme details and work together on composition techniques such as object placement and where shadows fall from the lighting. This is an advertising quality process and is slow in comparison to a photographer free holding a camera and candidly snapping. However, this process is chosen when the imagery is created as a team and more than one person has a role in the production and needs to see the process.
When styling a camera, the image is carefully constructed using a pre-planned set. Backgrounds, props and lighting have already been selected and prepared before the shoot begins. The image is composed using millimetre precision to ensure all important parts fit within the frame.
These types of images are great for campaign, print, website or branding photography as they allow high quality files to be captured. Templates can be used in the image capture software to help the team to allow for specific space for text and headings such as a magazine cover.
What is an image orientation?
Image orientation is most easily defined as Portrait, Landscape or Square. It can get confusing when planning a photoshoot as these shapes need to accommodate the final crop required from the file (the shape). Therefore, your website banner, EDMs and blog may not all be the same landscape shape (ratio) and if this isn’t planned for you risk losing important or beautiful and intentional parts of the original composition.
An easy solution is to leave space around the main subject matter so that you can crop into the image. However, this is not always possible, especially with large products that don’t have enough background space behind them. Elements of an image such as intentional shadows can also be seen as unusual when turning a portrait photograph on its side to make a landscape. The example below shows can image that has solid colour as negative space on the right side of the image. This allows the portrait format to be made into a landscape banner by extending the frame in Photoshop (we will demonstrate how to do this in a later post).
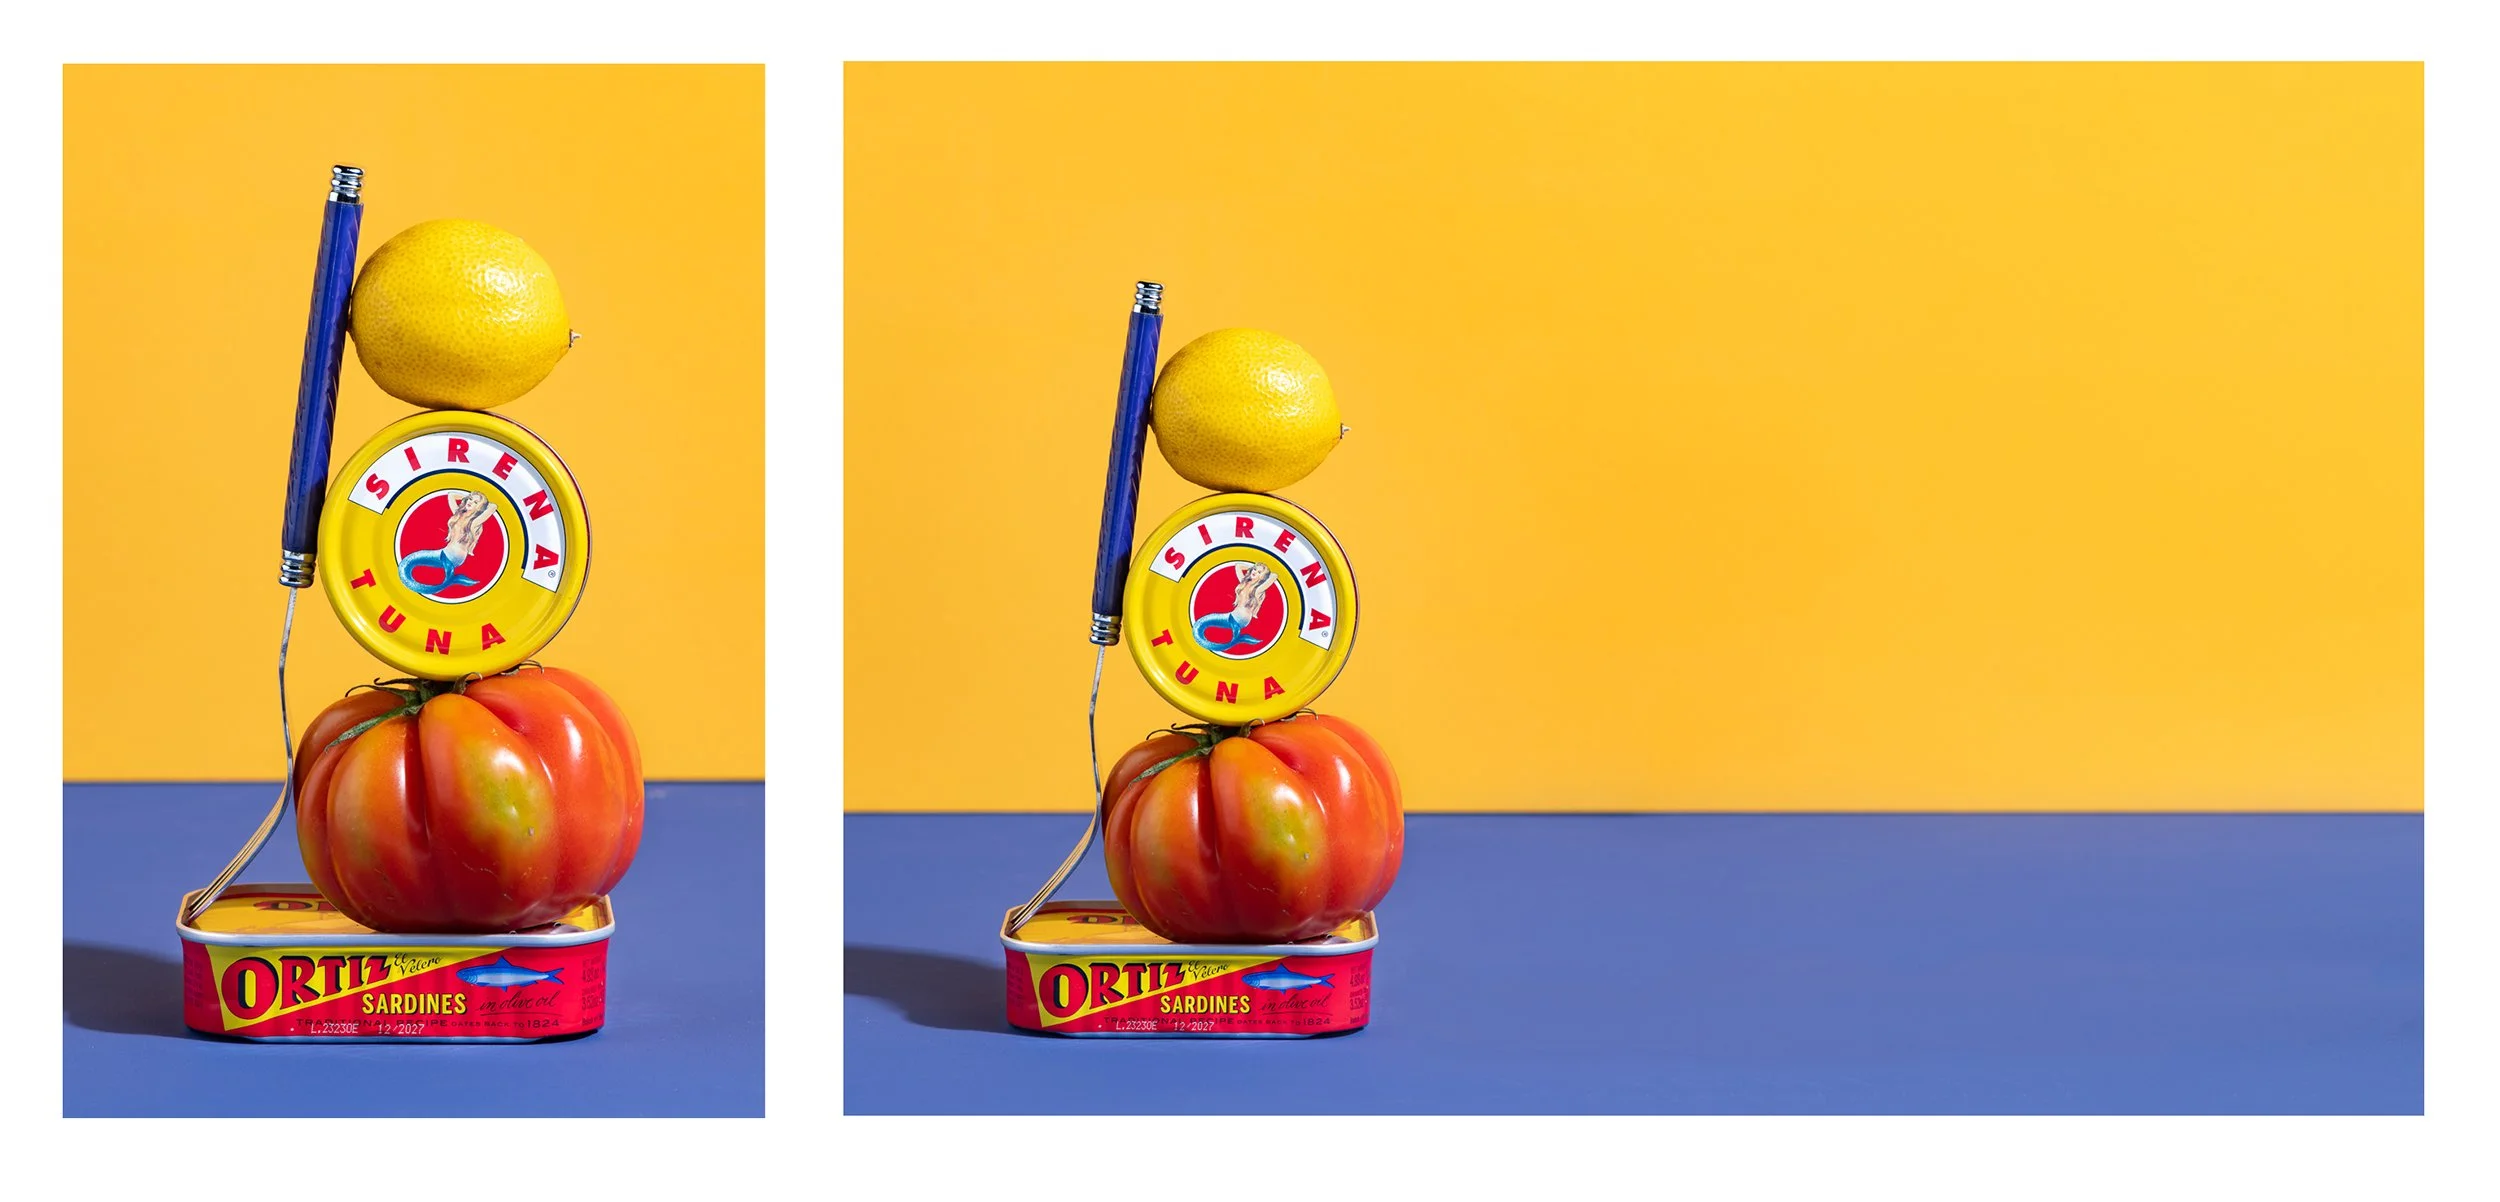
The image on the left is the original composition, framed as a portrait. By allowing uninterrupted solid colour on the right of the portrait format, we are able to extend the background easily so it can be used as a banner etc (image on the right). Extending the background on the left side of the portrait format would be more difficult as it includes a cropped shadow that is not easily replicated. Planning little things like this, or having awareness, can save you money later in retouching costs.
What is negative space?
Negative space in the context of graphic design is the area of the image that is left empty to be used for text and logos etc. When using negative space around products it frames them while creating emphasis and breathing room. Negative space can be easily added to an image in post production if the edge of the image is a clean solid colour. This is something to be aware of while capturing the images. If the frame crops through any objects on the set or the surrounding backgrounds are textured or busy, they are not easily extended in post production (this is an expensive thing you can avoid with planning).
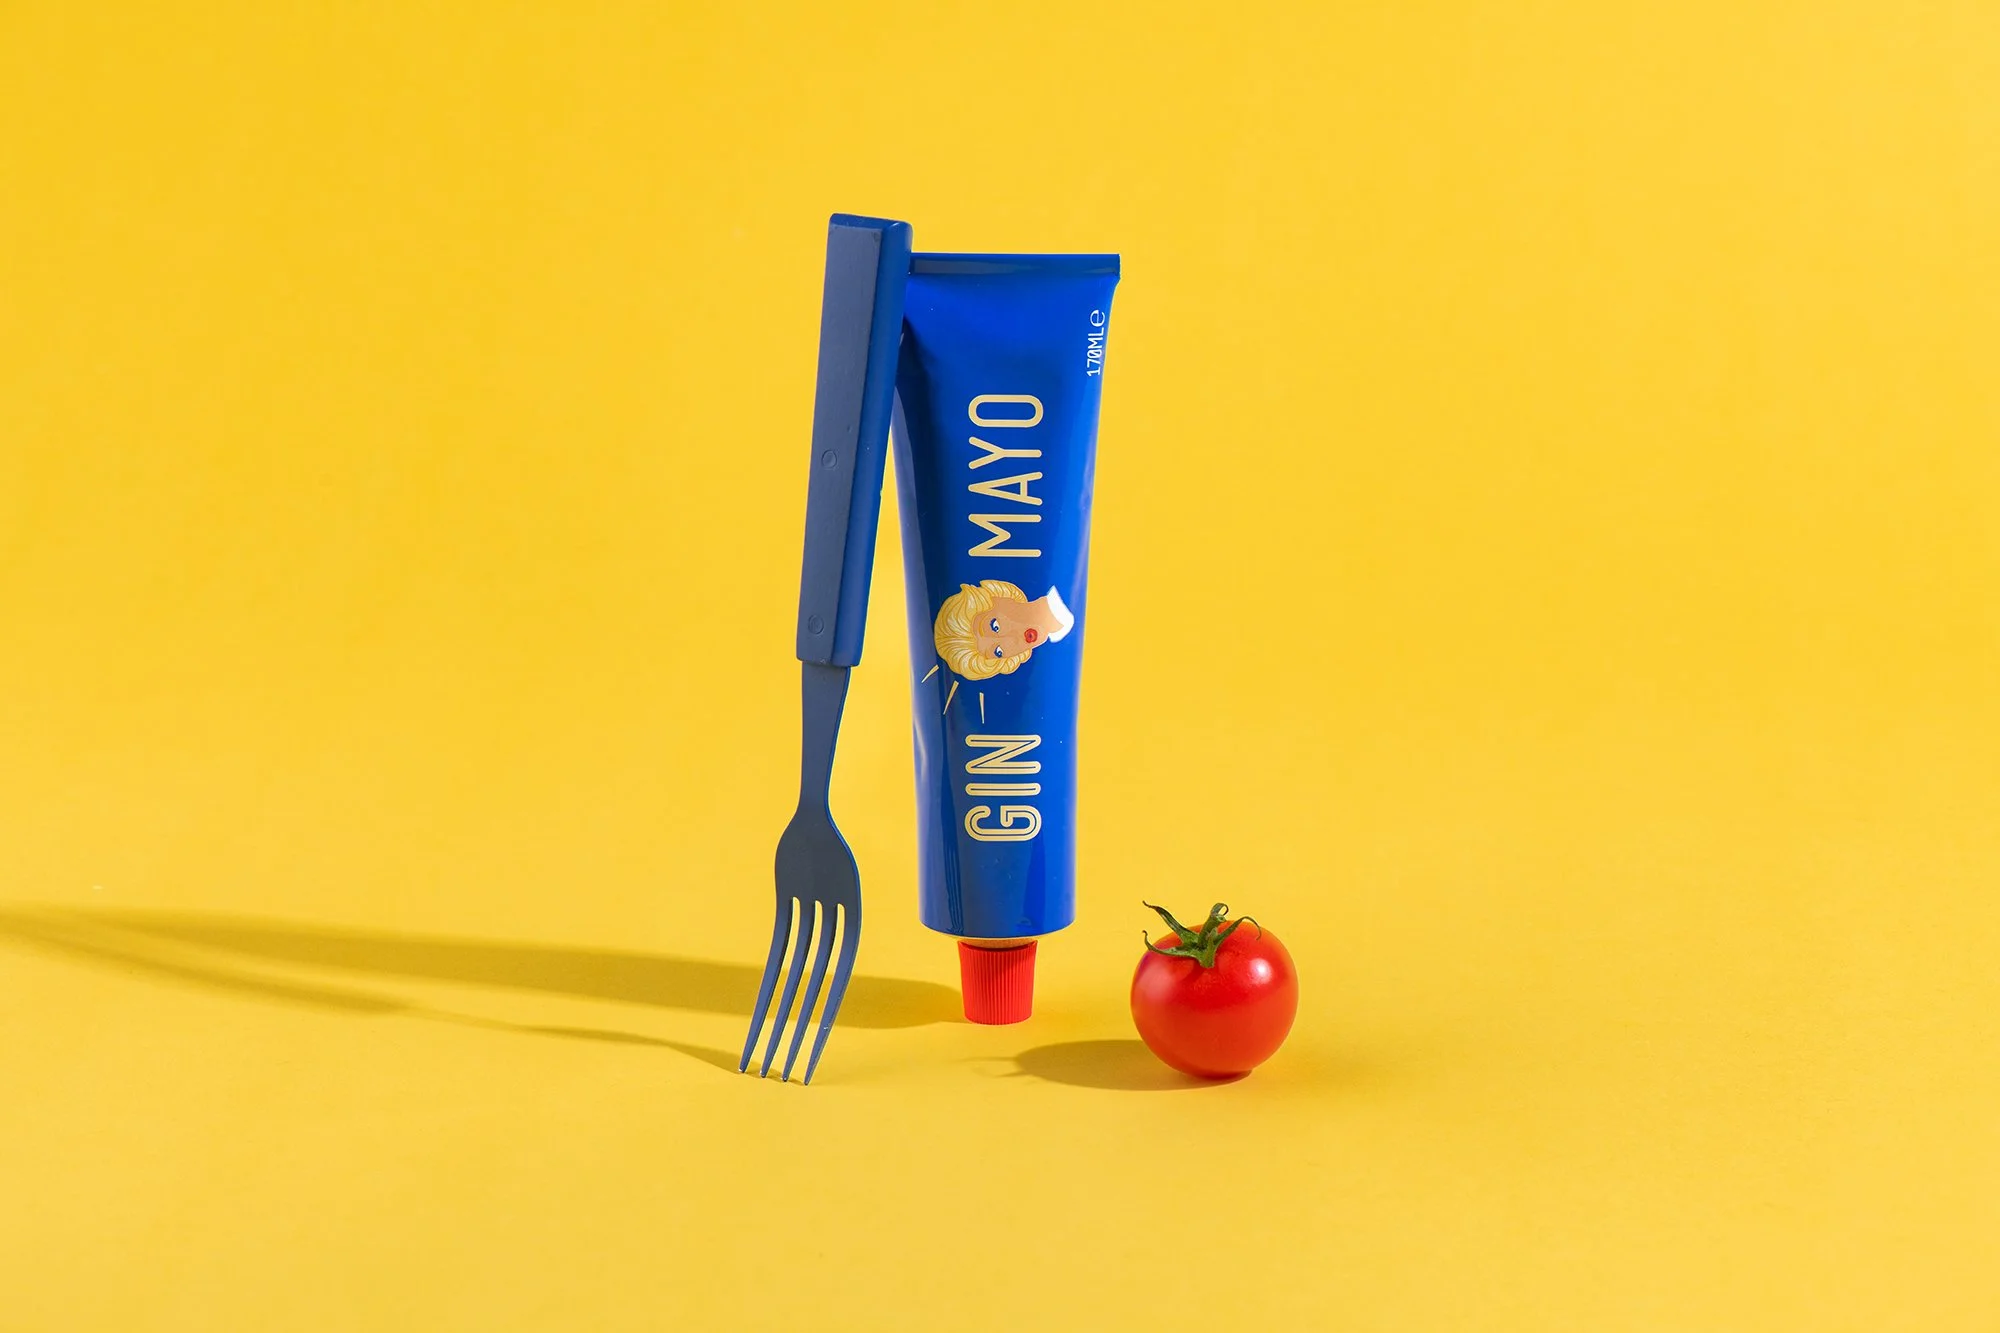
This is an example of capturing an image for a client who isn’t sure of the final image usage but needs the digital assets to launch. The file was delivered as full frame (uncropped) and has plenty of space to make the image a square, landscape or portrait. As this was captured on a paper roll and the product was small, allowing plenty of breathing space was easily achieved.
Solutions.
Plan your shot list carefully and know what you need specific images for. An example of this could be -
Website banner or EDM banners. You can visualise that they are landscape but what pixel dimensions / ratio are yours?
Social media. With current changes to social platforms, we can no longer assume that the majority of socials need to be composed as a square. When thinking through your photoshoot, try to plan for what social platforms you will be using. The rise of Video and animated photographs (stop motion) has seen photographers including portrait formats to accommodate reels.
Posters, books or online magazines. These are largely produced in portrait format.
Ecommerce Store. You may need square or portrait shots for the cover image of each category you are selling.
Marketing Postcards. These come in all kinds of shapes and sizes. Check with your printer what is on offer and what will suit your budget and plan for this shape to be covered in your photoshoot.
A photoshoot is as good as the planning that has gone into it. Knowledge of image orientation, use of negative space and potential cropping requirements is great to make note of in your shooting schedule (shot list). This way, you can avoid the disappointment of loving an image and not being able to use it in the marketing you intended it for.
Carli x